FireEye recently announced the 7th annual Flare-On Challenge! For those who are unaware, Flare-On is the Front Line Applied Research & Expertise (FLARE) team’s annual CTF-style challenge for all active and aspiring reverse engineers, malware analysts and security professionals. I first attempted Flare-on in 2019 and I’m looking forward to hopefully making it further in my second attempt. I decided to get some practice in before this year’s challenge opens by re-attacking Flare-On 2019. I know that plenty of write-ups already exist for the challenges I’m documenting at this point. This post is just an attempt to make note of preparation and makes for a fun excuse to do some reversing challenges.
I’m using FireEye’s FLARE VM for these challenges. It comes with tons of useful tools for malware analysis and/or reverse engineering. I don’t recall having to install additional tools for any of the few challenges I completed - with the exception of Android Studio to analyse and execute the .apk file from level 2.
Level 1: Meme Cat Battlestation
Level 1 starts out nice and simple with an awesome theme. The challenge consists of a single file - MemeCatBattleStation.exe, accompanied by a helpful hint in Message.txt:
Welcome to the Sixth Flare-On Challenge!

This is a simple game. Reverse engineer it to figure out what "weapon codes" you need to enter to defeat each of the two enemies and the victory screen will reveal the flag. Enter the flag here on this site to score and move on to the next level.

* This challenge is written in .NET. If you don't already have a favorite .NET reverse engineering tool I recommend dnSpy

** If you already solved the full version of this game at our booth at BlackHat  or the subsequent release on twitter, congratulations, enter the flag from the victory screen now to bypass this level.
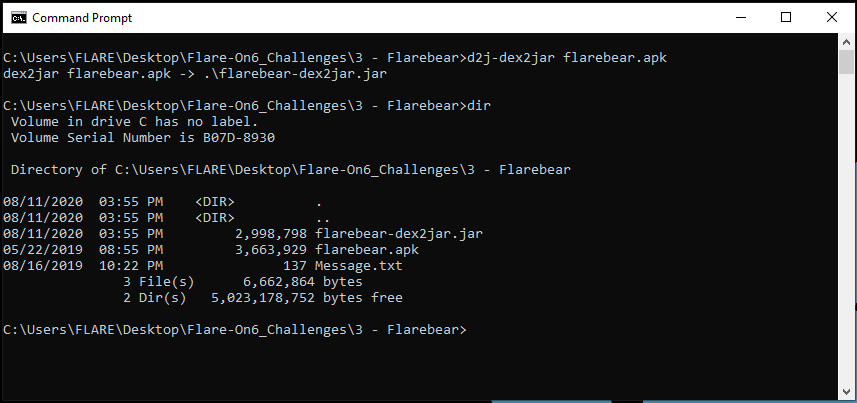
A quick check with CFF explorer shows that we’re definitely working with a 32bit .NET assembly.

A .NET assembly has been compiled to managed code - specifically, Microsoft Intermediate Language (MSIL). It is then Just-In-Time (JIT)-compiled into machine code by the CLR when executed. MSIL can be easily decompiled to something that looks very close to the assembly’s original source code.
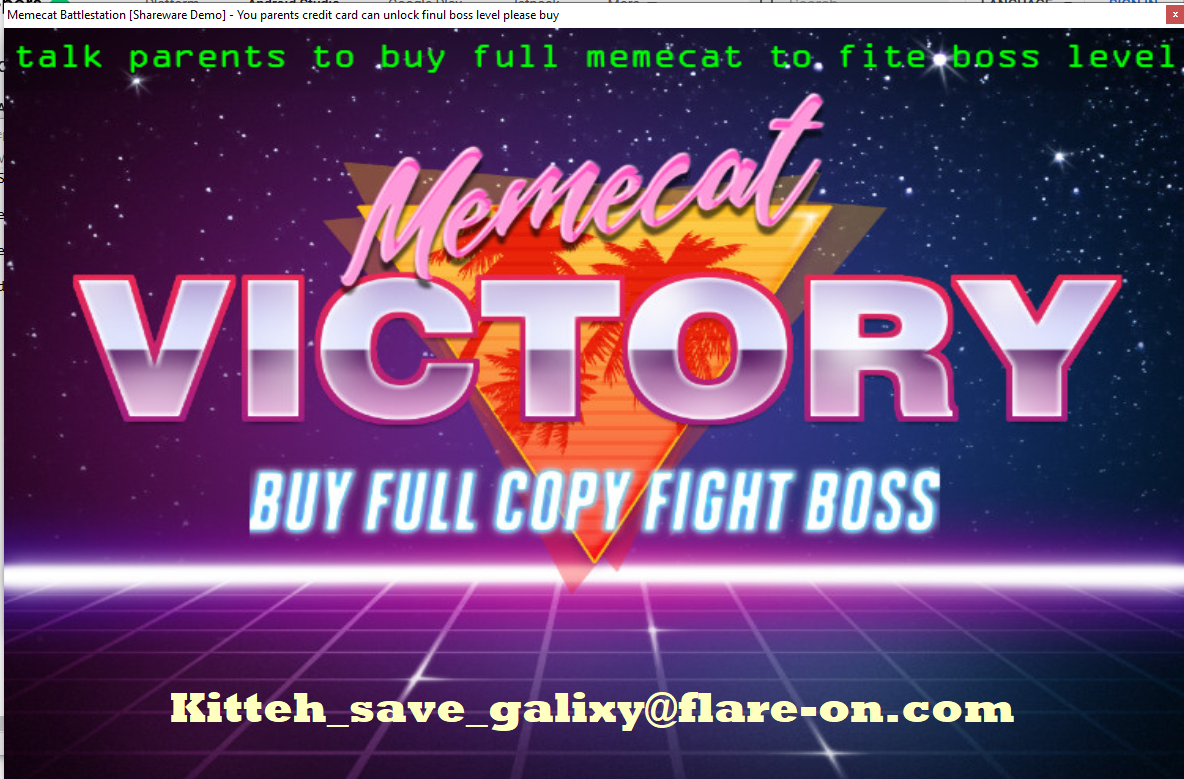
Here’s what the application looks like when it runs.
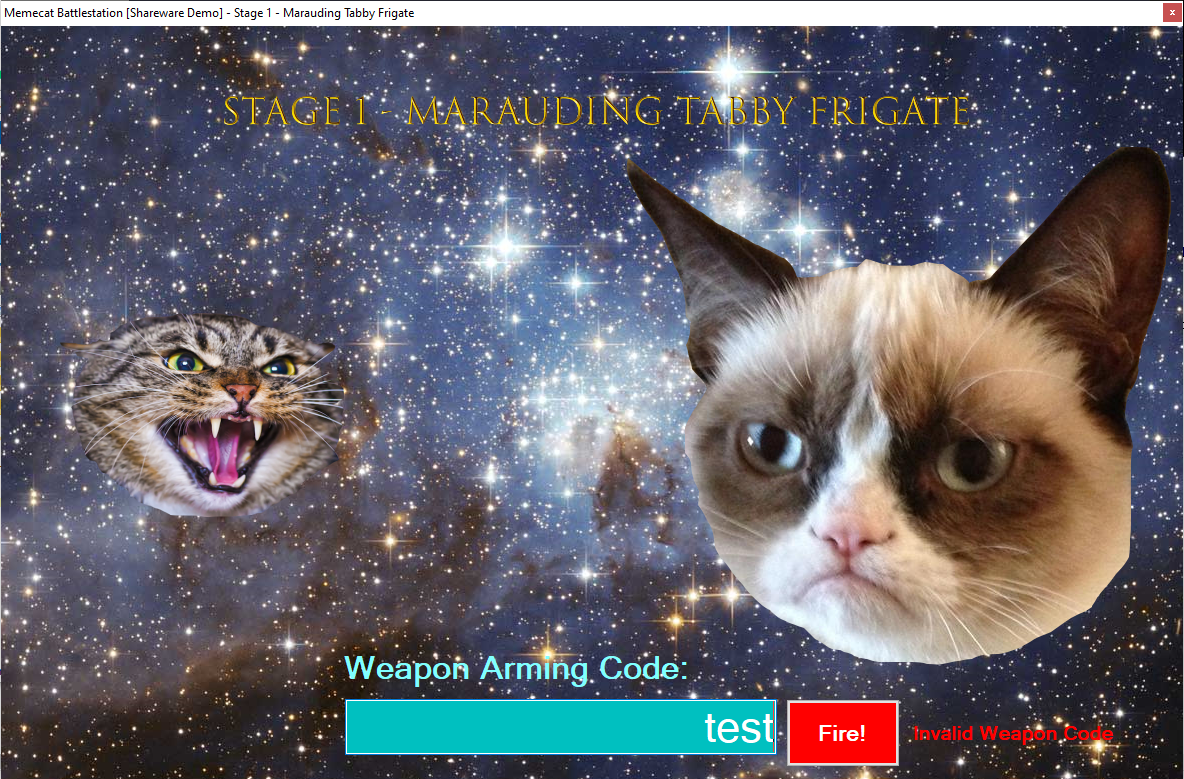
I can quickly determine a couple of things by seeing what happens when it runs.
- I need to find a ‘Weapon Arming Code’
- There are probably multiple ‘Stages’ that will need to be cleared to get the flag
- The challenge creator’s memes are dank
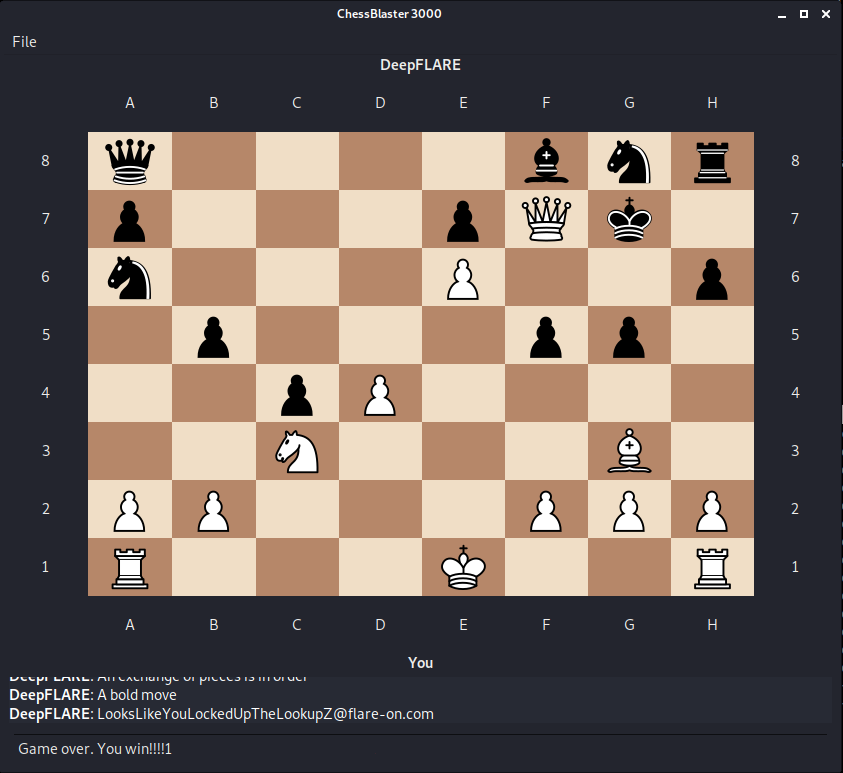
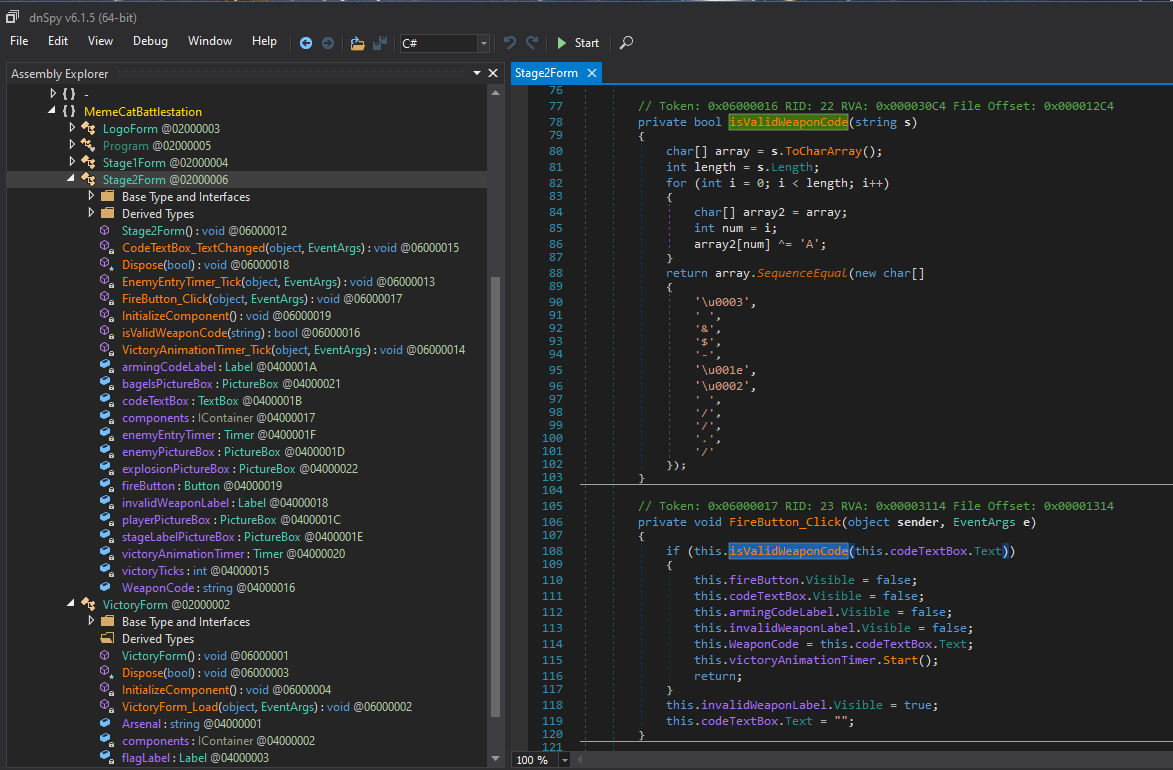
The tool dnspy allows for reverse engineering .NET assemblies, including debugging and decompiling them - and is already installed in FLARE VM. Dnspy shows that there are 3 WinForms in the assembly that I care about: ‘Stage1Form’, ‘Stage2Form’ and ‘VictoryForm’. Stage1Form has a function called FireButton_Click() that checks the string typed by the user against the string “RAINBOW”. So that one was easy enough…
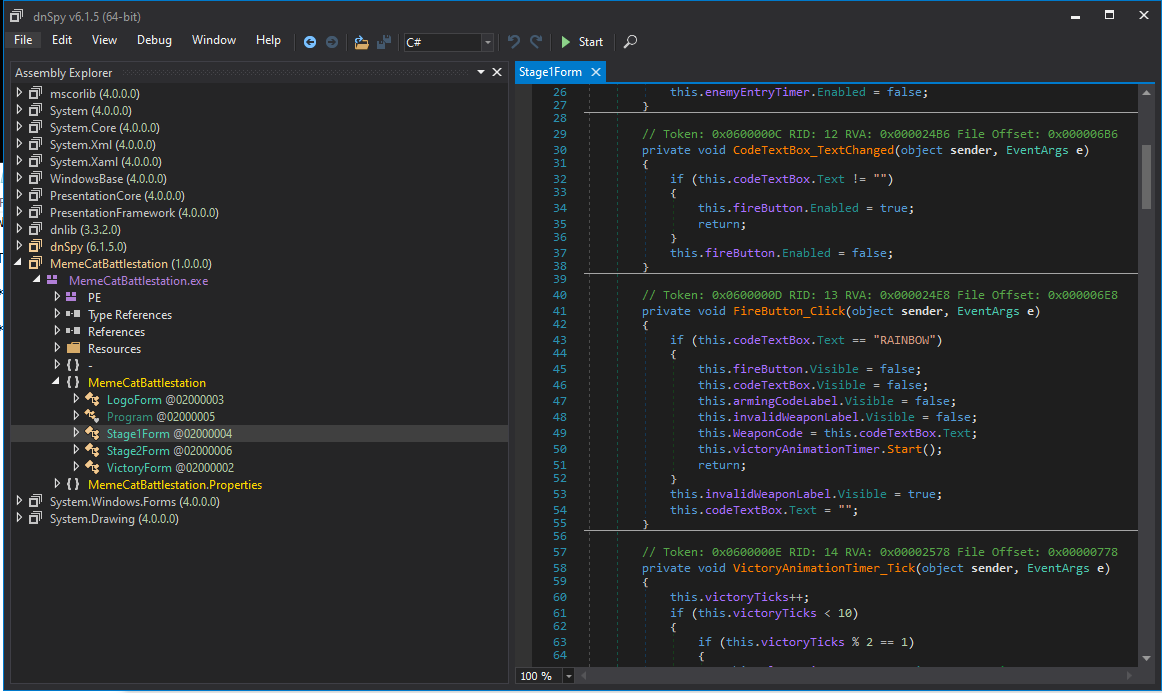
Typing the correct weapon code gives me a cool cat rainbow lazer animation then executes the Stage2Form, which prompts for another weapon arming code. The relevant code for stage 2 is below. Once a weapon code is provided, each character of the code is XORd with 0x41 (‘A’) and compared to the char[] array declared at the bottom of the isValidWeaponCode() function. If this function resolves true, the victory animation timer is started and I should be given the flag…
There are plenty of ways to transform this back into the plaintext weapon code. I chose to use CyberChef to escape the unicode characters (\u00xx) and perform the XOR function. Here’s the result…
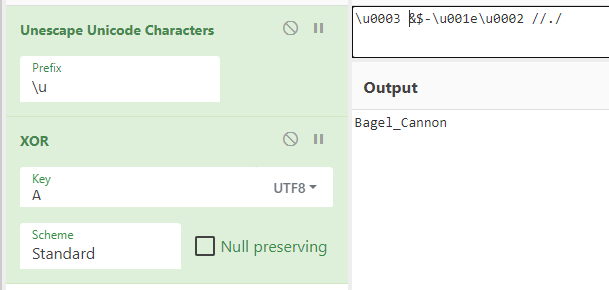
Plugging that in gives me the flag Kitteh_save_galixy@flare-on.com :)
Level 2: Overlong
Level 2 is a 32bit Portable Executable accompanied by a text file that says:
The secret of this next challenge is cleverly hidden. However, with the right approach, finding the solution will not take an <b>overlong</b> amount of time.
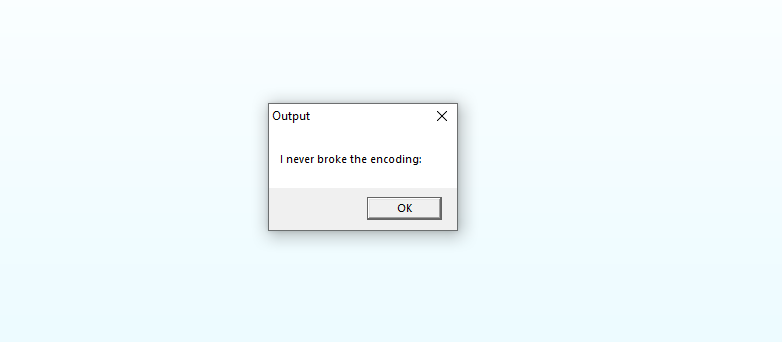
Running the binary only gives me a small “Output” window suggesting that some ‘encoding’ occurs.
From here, I found both static and dynamic analysis useful. For debugging Windows Portable Executables, I normally use x32/x64dbg and IDA or Ghidra for disassembly. First, opening the file in IDA and viewing the entry function shows that two functions being called. The second function is a call to MessageBoxA which is where our ‘Output’ window is being created. The first one takes three arguments:
- A memory address to an empty local buffer
- “offset unk_402008” (Blob of seemingly encoded data from offset 0x402008 in .rdata)
- The value 0x1c

Now I know that whatever ‘encoding’ might be occurring must be happening in the function “sub_401160” so next, I check out what it does. To summarise - the function loops x times, where x is the 3rd argument passed to the function. By default this is the constant 0x1c. For each iteration of the loop, it performs some kind of encoding (I didn’t bother fully trying to understand because in this case, I didn’t need to) on a byte from the data passed in as argument 2 before writing that ‘decoded’ byte to the next spot in the buffer passed by address as the 3rd argument.
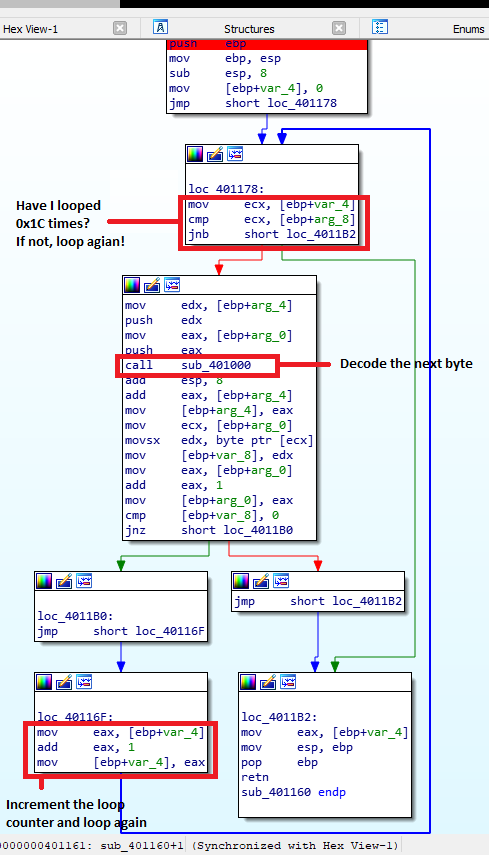
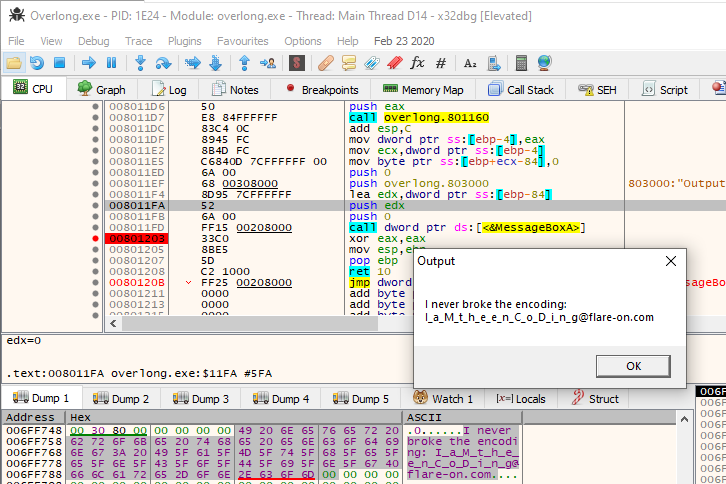
The number 0x1c (28 decimal) = the length of “I never broke the encoding: “ with a trailing space. So, it seems like the function is only decoding the first 28 bytes of data and the flag should be in the remainder of the data! I can easily test this in a debugger by increasing that value 0x1C to see if the function decodes more bytes… Here’s what that looks like in x32dbg:
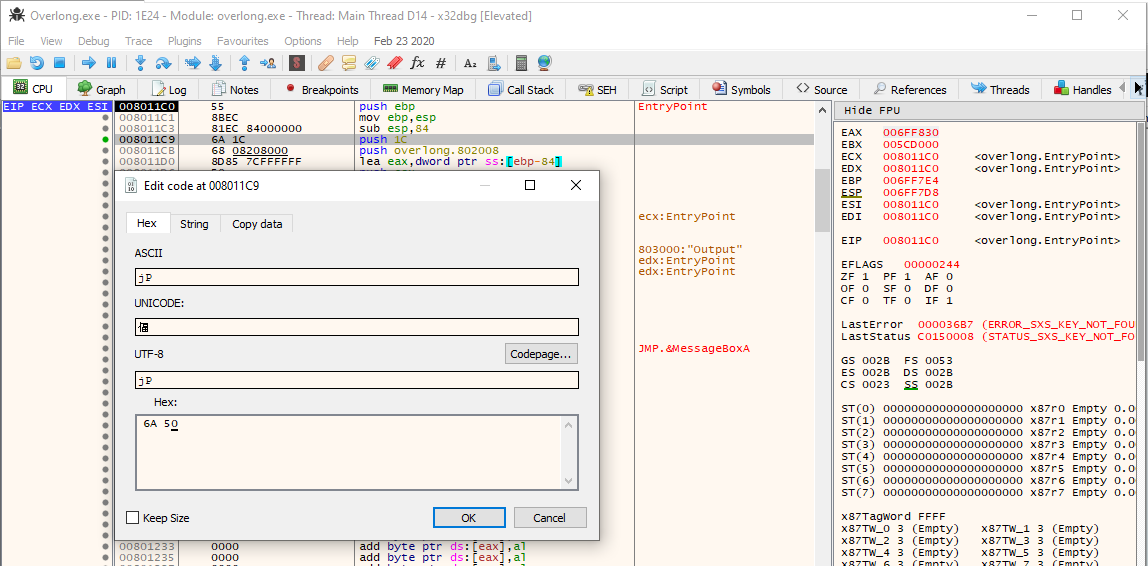
Now if I run the program, it loops enough times to decode the rest of the flag!
Level 3: Flarebear
Level 3 is an APK accompanied by this message:
We at Flare have created our own Tamagotchi pet, the flarebear. He is very fussy. Keep him alive and happy and he will give you the flag.
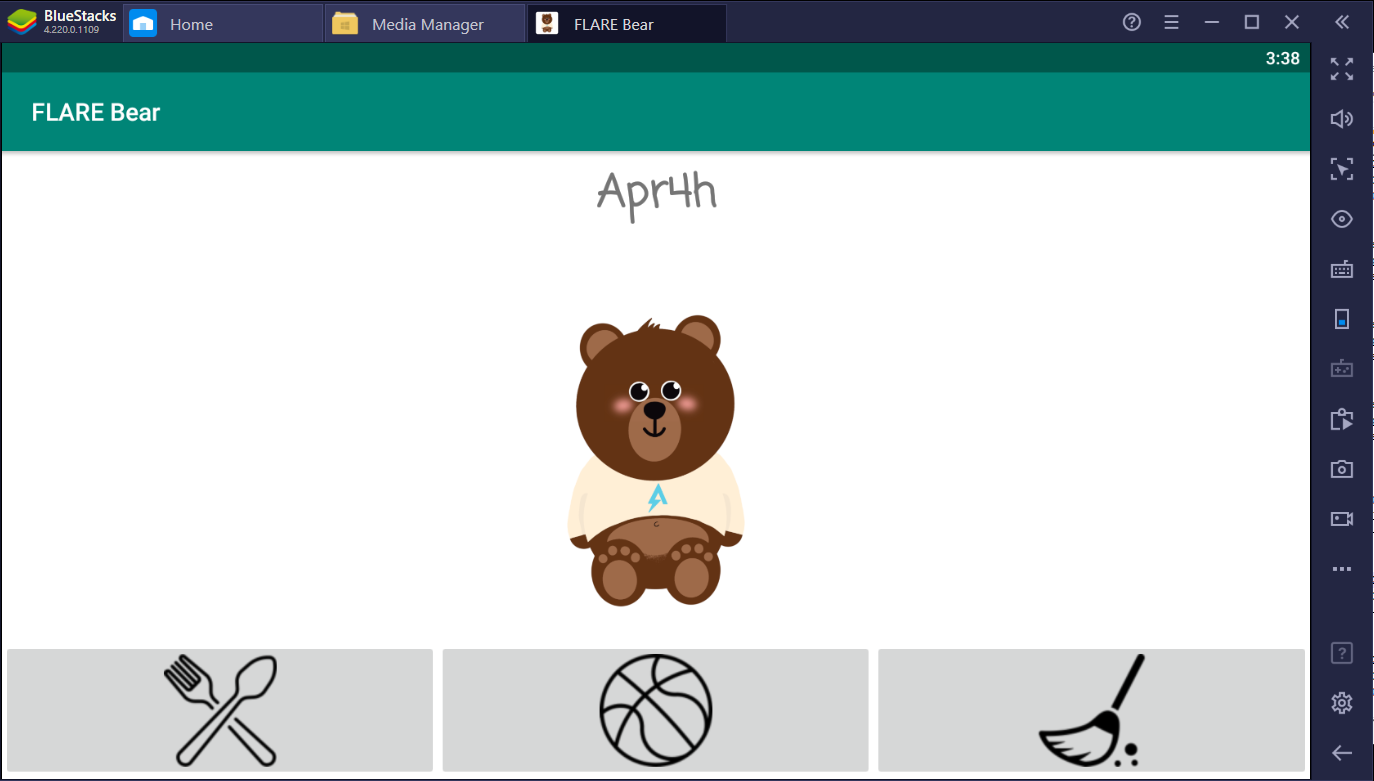
I used the bluestacks emulator to run the APK. The app lets you create your own bear which you can feed, play with, and clean when he poos.
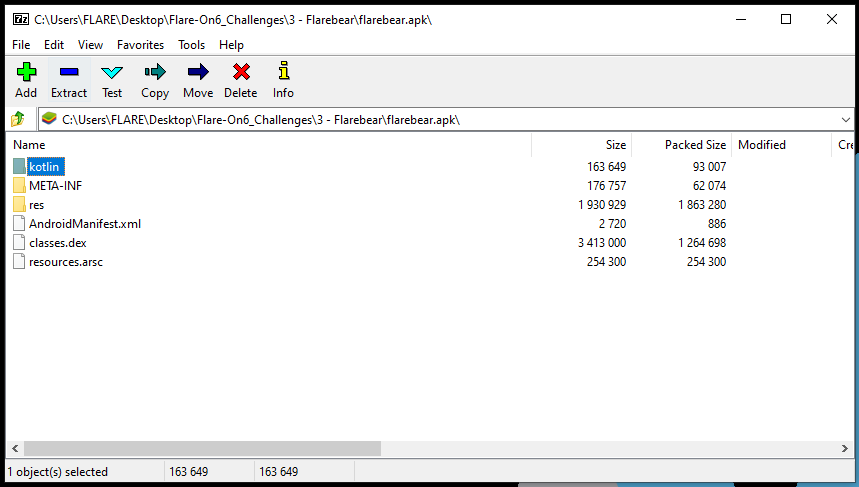
A quick peek at the APK’s contents with 7zip shows that this Tamagochi app was written in Kotlin rather than Java based on the directory structure and filenames.
Thankfully, I can convert the APK to a Java archive for easier static analysis using d2j-dex2jar.
Now I can examine the app’s code using a Java decompiler. The main class I care about is FlareBearActivity.class - based on some digging and ctrl+f for the word ‘flag’
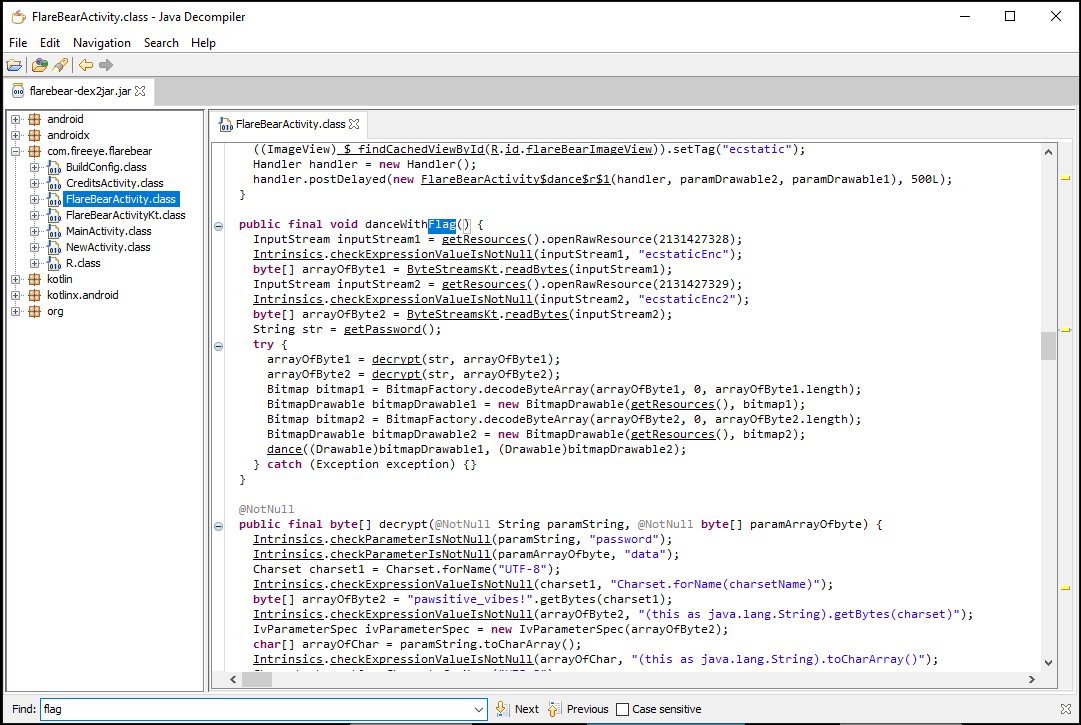
If I can get the danceWithFlag() function to run, I should get the flag for this level. From here I can work through the code backwards…
setMood() calls danceWtihFlag() if isEcstatic() returns true.
public final void setMood() {
	if (isHappy()) {
	  ((ImageView)_$_findCachedViewById(R.id.flareBearImageView)).setTag("happy");
	  if (isEcstatic())
		danceWithFlag();
	} else {
	  ((ImageView)_$_findCachedViewById(R.id.flareBearImageView)).setTag("sad");
	}
}
isEcstatic() returns true if the Tamagochi’s “mass” is 72, “happy” is 30 and “clean” is 0.
public final boolean isEcstatic() {
	boolean bool1 = false;
	int i = getState("mass", 0);
	int j = getState("happy", 0);
	int k = getState("clean", 0);
	boolean bool2 = bool1;
	if (i == 72) {
	  bool2 = bool1;
	  if (j == 30) {
		bool2 = bool1;
		if (k == 0)
		  bool2 = true;
	  }
	}
	return bool2;
}
The functions feed(), play() and clean() affect the Tamachochi’s “mass”, “happy” and “clean” values.
- feed()
- mass + 10
- happy + 2
- clean - 1
- play()
- mass - 2
- happy + 4
- clean - 1
- clean()
- mass + 0
- happy - 1
- clean + 6
The following sequence of activities should therefore make isEcstatic() return true:
- feed 8 times
- play 4 times
- clean 2 times
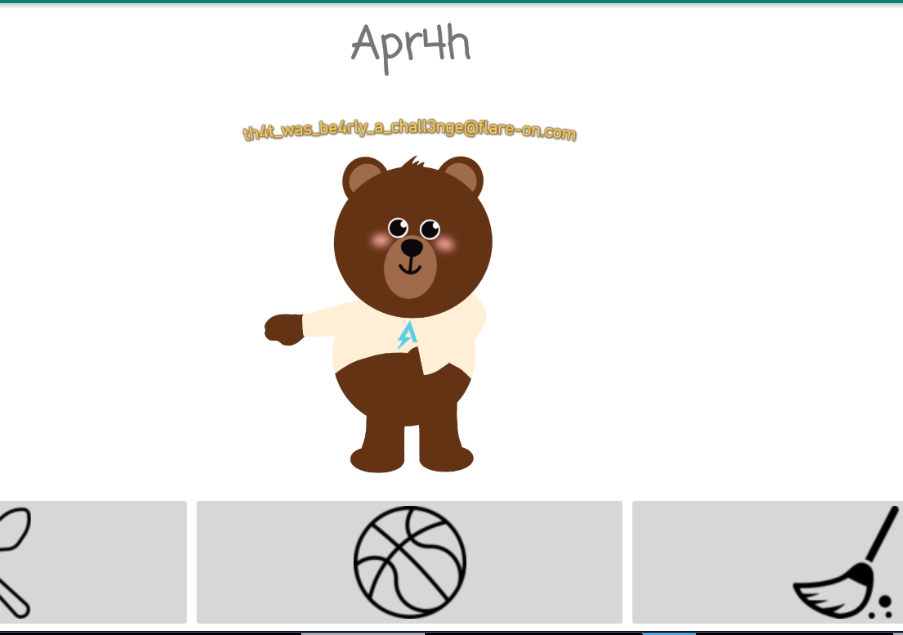
And I get the flag! th4t_was_be4rly_a_chall3nge@flare-on.com
Level 4: Dnschess
This time, we’re given 3 files:
- ChessUI (a 64 bit ELF)
- ChessAI.so (a 64 bit ELF shared library)
- a pcap
And of course, Message.txt containing the clue for this level:
Some suspicious network traffic led us to this unauthorized chess program running on an Ubuntu desktop. This appears to be the work of cyberspace computer hackers. You'll need to make the right moves to solve this one. Good luck!
I used FLARE VM to statically analyse these binaries, but also used a Kali Linux VM that I had on-hand for dynamic analysis.
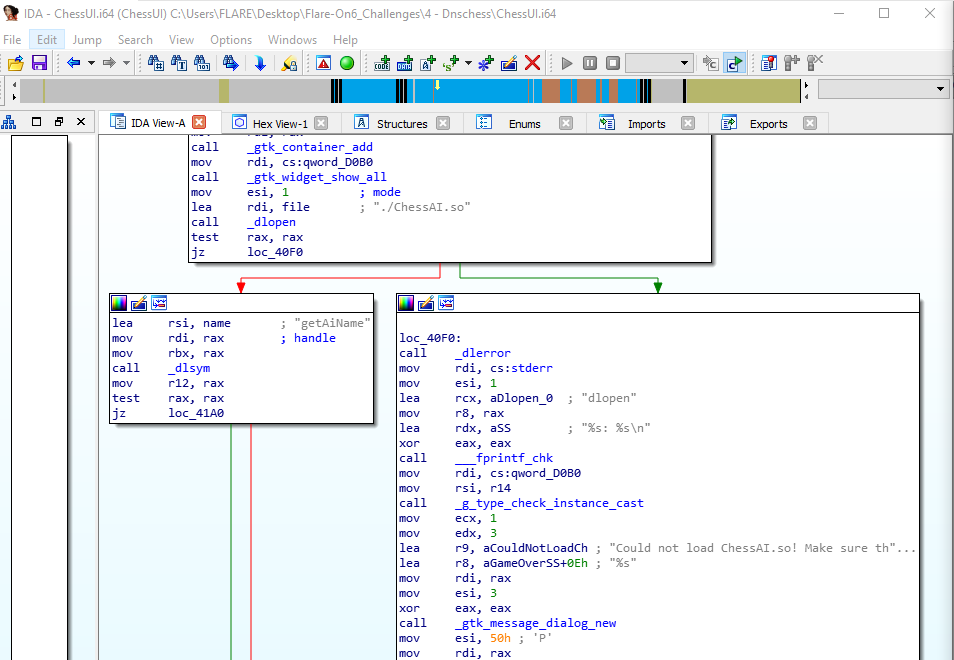
By looking at the disassembly, I can see that ChessUI loads the shared library ChessAI.so and then starts calling exported functions from it, including GetAiName(), GetAiGreeting() and most interestingly GetNextMove().
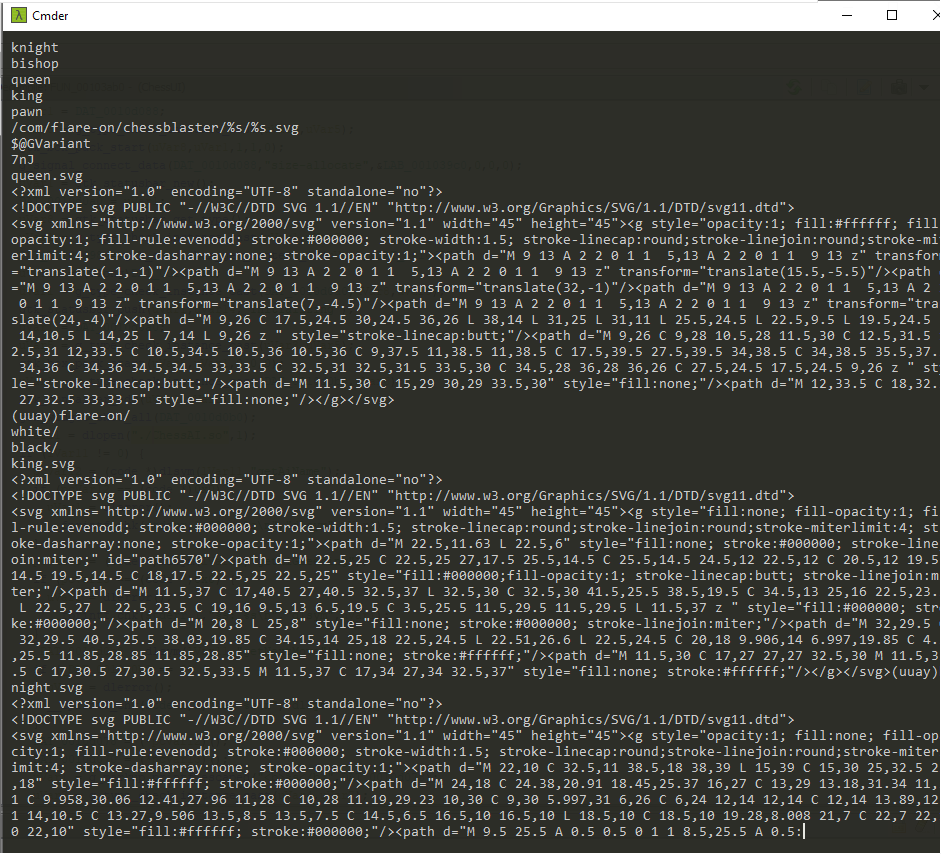
I can also make an educated guess that ChessUI is generating a chess board user interface based on the references to GTK, embedded SVGs with namers of chess pieces in the binary’s strings.
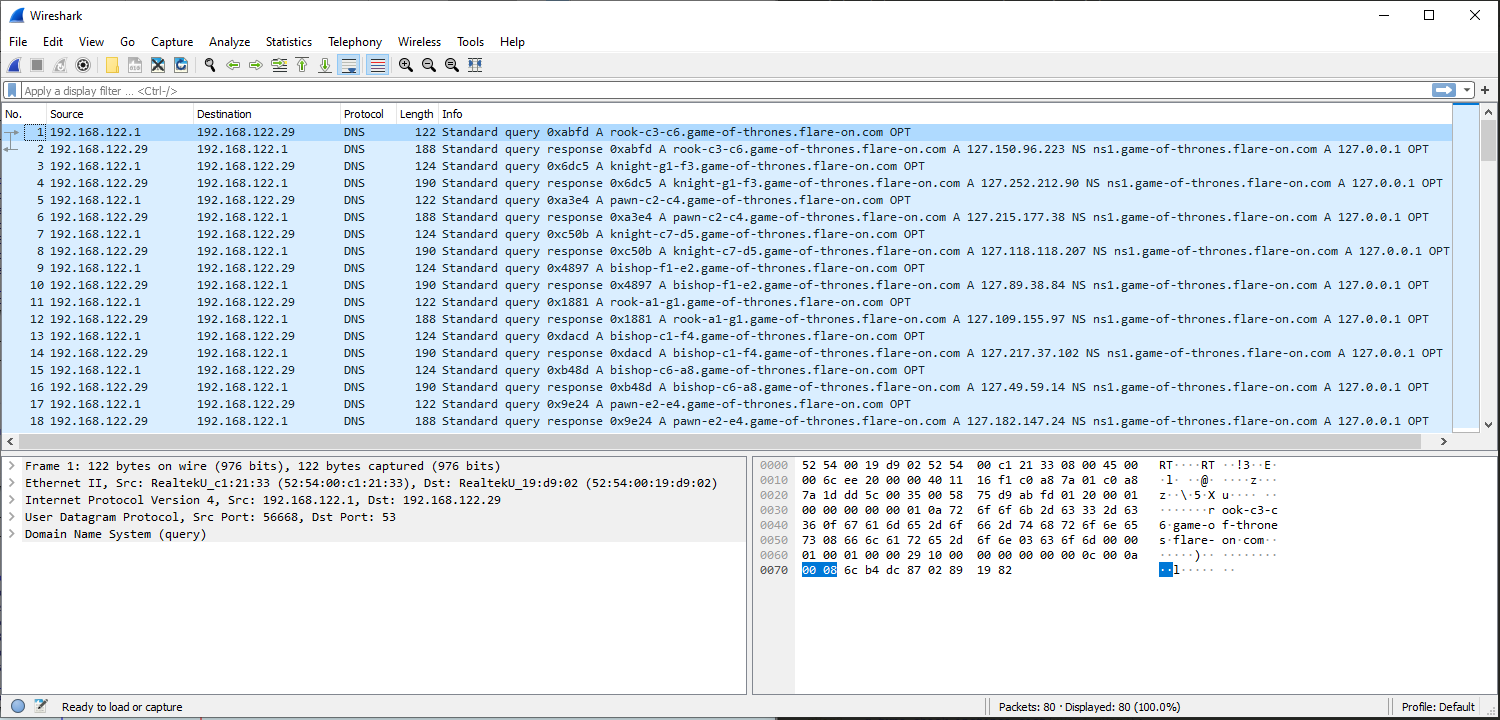
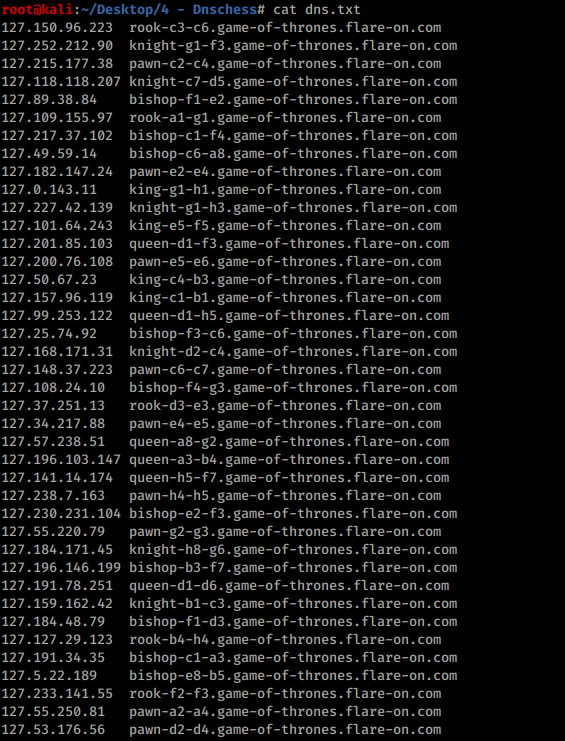
Inspecting the pcap shows a series of DNS requests and responses. The domain in each request takes the form of a ‘-‘ delimeted chess move prepended to .game-of-thrones.flare-on.com. Each response is an A record whose first octet is ‘127’.
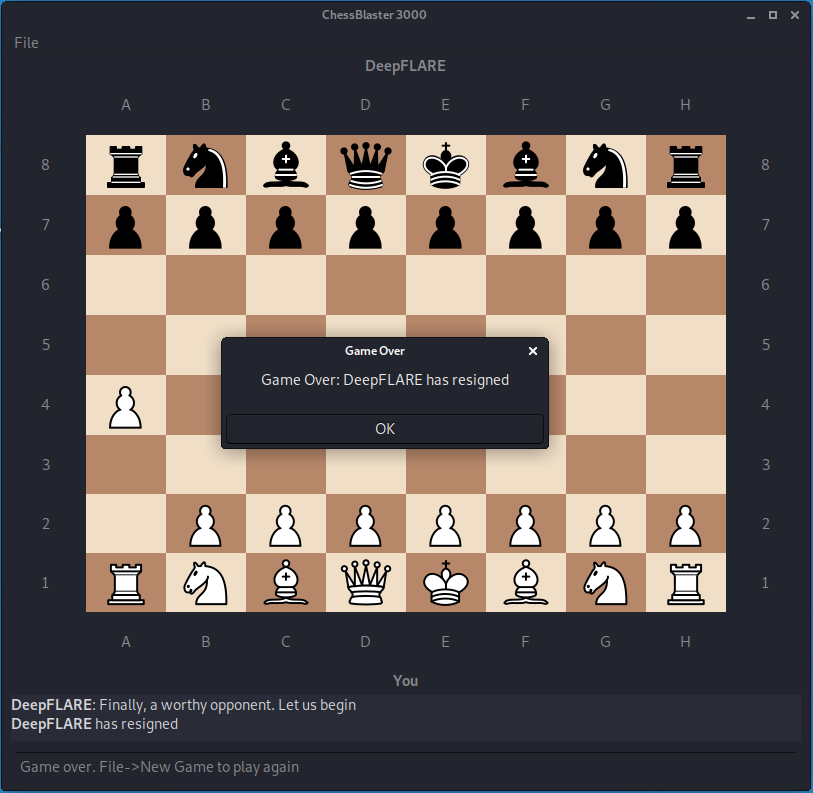
Next, I executed ChessUI. A chess board UI is generated and the DEEPFLARE AI asks me to make a chess move. If I move a piece, the AI instantly resigns.
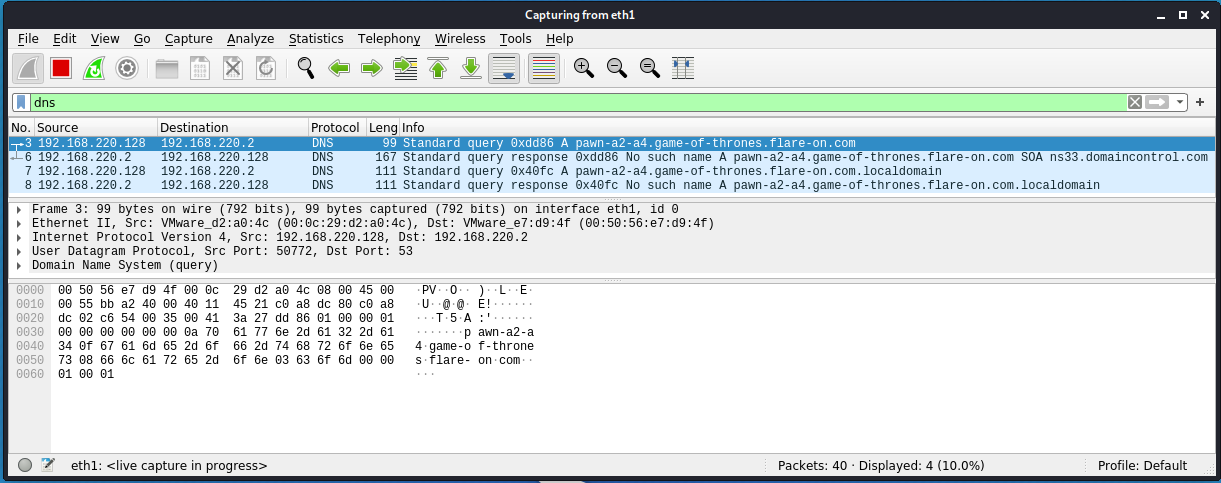
I started capturing network traffic with Wireshark while running ChessUI. A DNS request is made corresponding to the chess move I made. The ‘No such name’ DNS response captured in wireshark probably has something to do with the AI resigning straight away.
Next I decided to look at ChessAI.so to get a better idea of what’s happening when I make a move on the chess board. GetNExtMove() seemed to be where the DNS request is being made. Ghidra’s decomiler made understanding this function much easier.
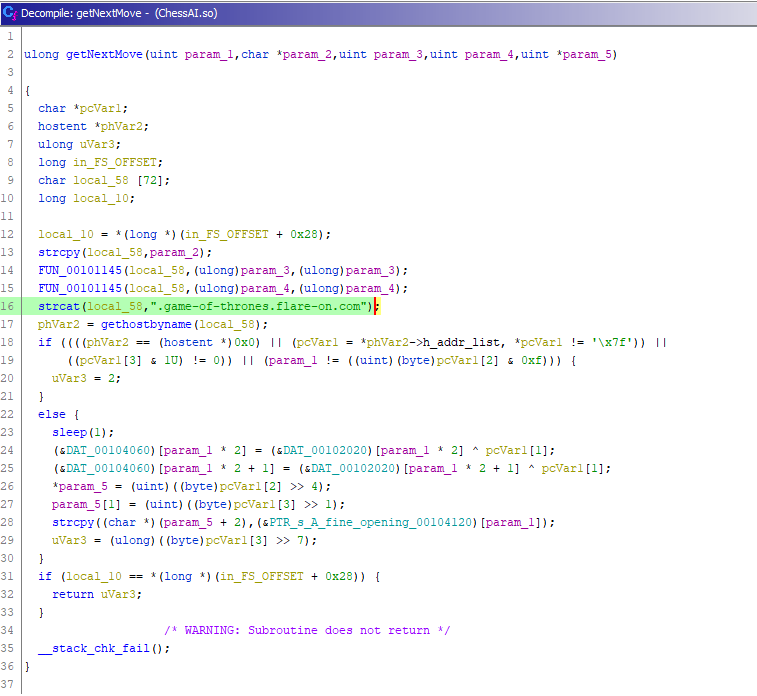
Firstly, this function builds the domain string from my chess move and makes the DNS request. Second, it contains the logic to determine whether move was a valid one - based on param_1 and IPv4 address returned in the DNS response.
The ‘if’ statement below needs to resolve to False for a given move to be valid:
  if ((((phVar2 == (hostent *)0x0) || (pcVar1 = *phVar2->h_addr_list, *pcVar1 != '\x7f')) ||
      ((pcVar1[3] & 1U) != 0)) || (param_1 != ((uint)(byte)pcVar1[2] & 0xf))) {
    uVar3 = 2;
  }
To break this down, the following expressions all need to evaluate to True
(phVar2 == (hostent *)0x0)the DNS request must have successfully resolved(pcVar1 = *phVar2->h_addr_list, *pcVar1 != '\x7f')The first octet of the IP address must be ‘127’ (\x7f)(pcVar1[3] & 1U) != 0))The last bit of the fourth octet of the IP address must be 0(param_1 != ((uint)(byte)pcVar1[2] & 0xf))The last four bits of the third octet must equalparam_1, which is equal to the number of turns taken by the player.
Next, I extracted each move and its corresponding ip address from the pcap with tshark into a text file and cleaned up the output. I added these lines into /etc/hosts so that they would resolve properly.
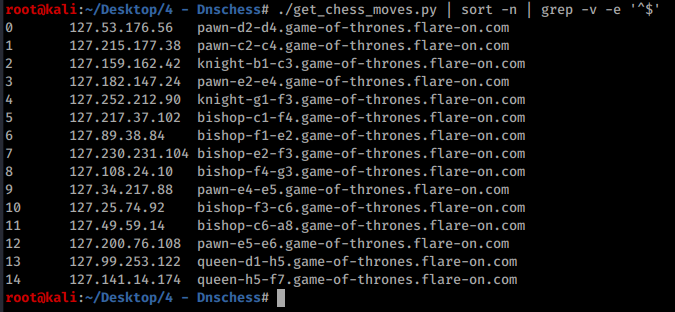
With a few lines of python I was able to determine which of the moves above are valid based on their IP address and work out the order in which each valid move should be played. The move order can be worked out with a mod 16 operation, because param_1 (the turn number) must equal the IP address’s 3rd octet AND-ed with \xf each time a move is made.
#!/usr/bin/env python3

with open("dns.txt") as f:
    moves = f.readlines()
    for move in moves:
        octets = move.split(".")
        if int(octets[3].split('\t')[0]) & 1 == 0:
            print(f"{int(octets[2]) % 16}\t{move}")
With some help from bash, I get a clean outputted sequence of moves…
Playing these moves in order puts the AI in checkmate and prints the flag :)